Settings
After a successful login, you will see Aggies’s front end interface as below.
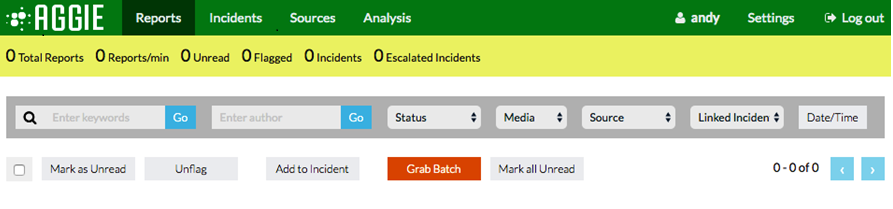 Main Menu
Fetching
Fetching allows Aggie to receive feeds from all sources at a global level.
Toggling ON/OFF Fetching
Fetching can be enabled or disabled by toggling ON/OFF the fetching toggle. To toggle ON/OFF fetching, please follow the steps below.
From the menu bar, click Settings and select Settings.
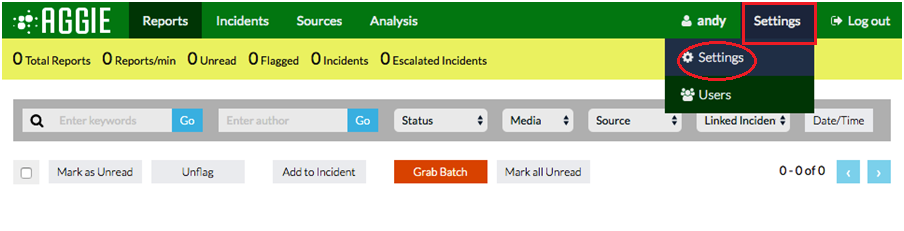 Fetching ON/OFF
Click ON/OFF on the fetching toggle to switch fetching ON/OFF.
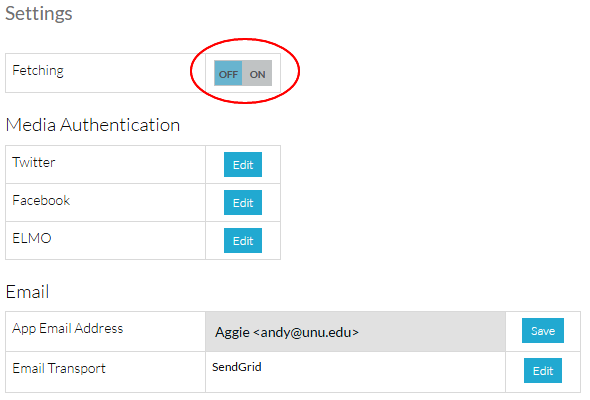 Fetching ON/OFF
Generating Source Tokens
Twitter API Access Token
Visit Twitter’s Apps Page and login with your Twitter Credentials.
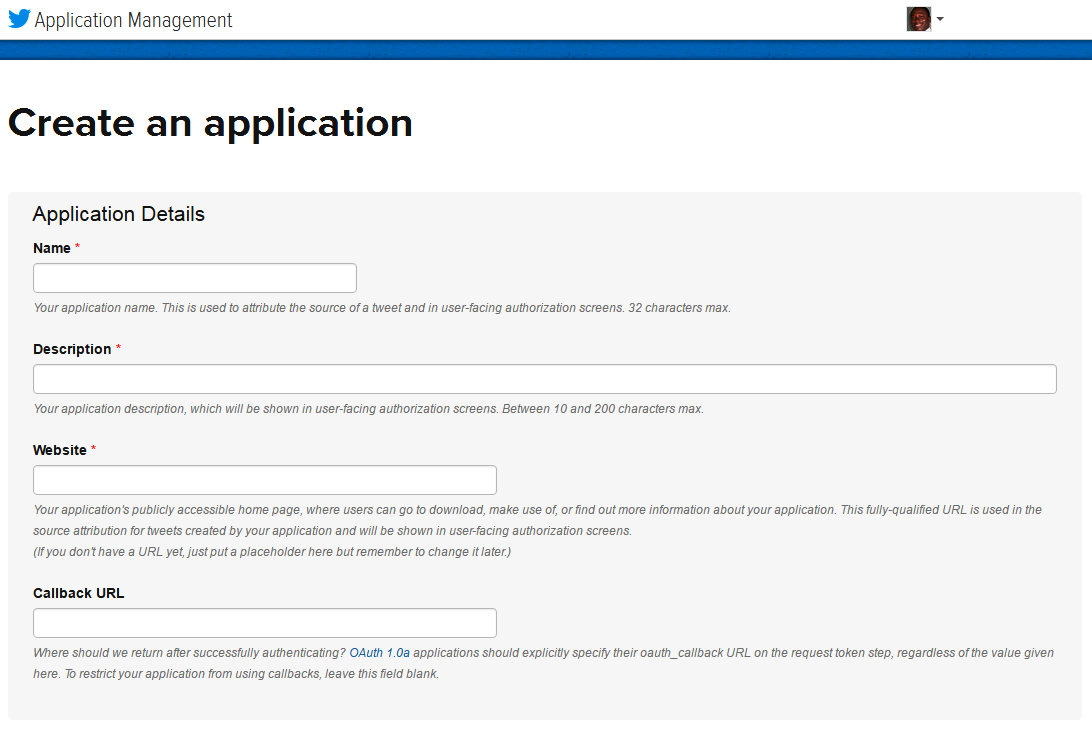
Click on the Create New App Tab.
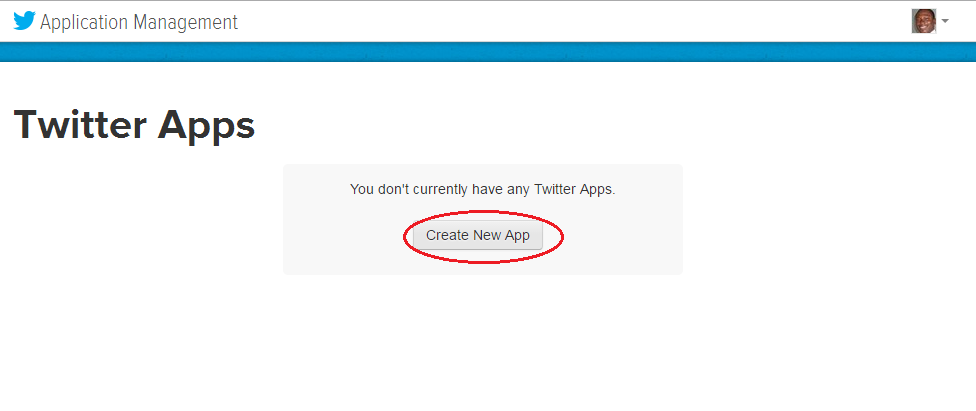 Twitter Apps
Fill in the Application Details and agree to the developer agreement at the bottom to create the app.
 Twitter Apps
This will create access tokens as indicated below.
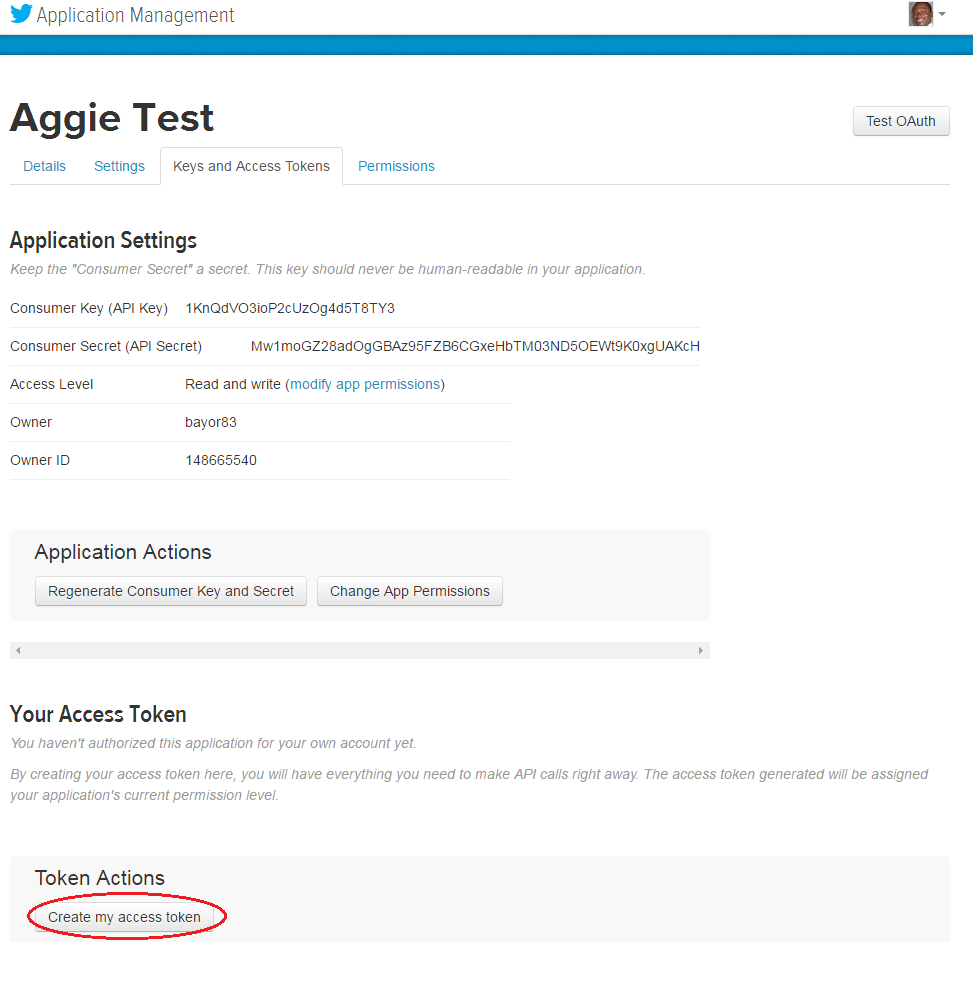 Twitter Apps
Click on Create My Access Token to create Access Token and Access Token Secret.
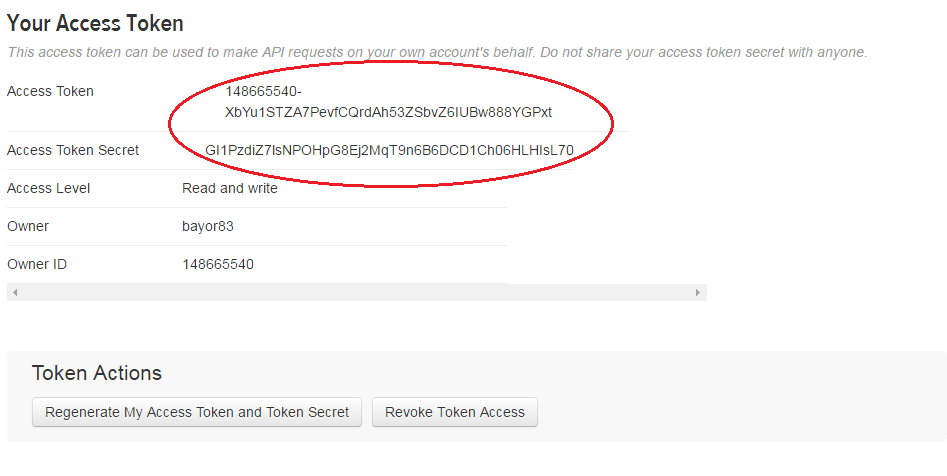 Twitter Apps
With these access tokens, fellow the instructions from Adding Media Feeds to Aggie section and edit the Twitter settings in Aggie.
Facebook API Access Tokens
Visit Facebook’s Apps page and login with your credentials.
Click on Create a new app at the top right corner.
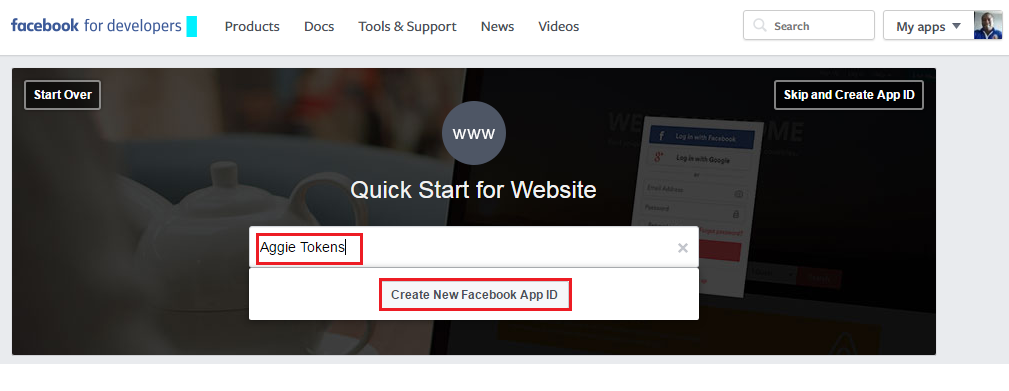
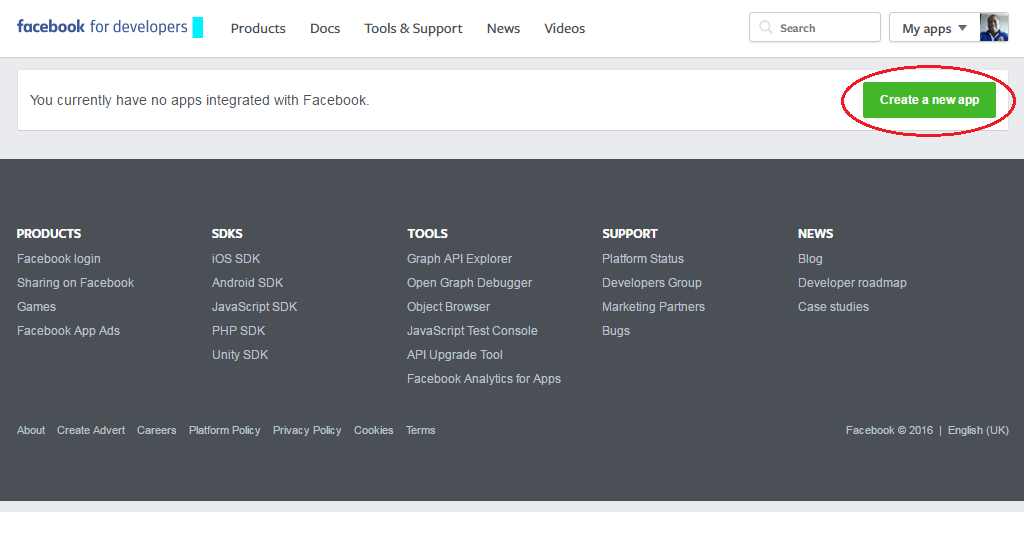 Facebook Apps
Type in the name of your app and click on Create New Facebook App ID.
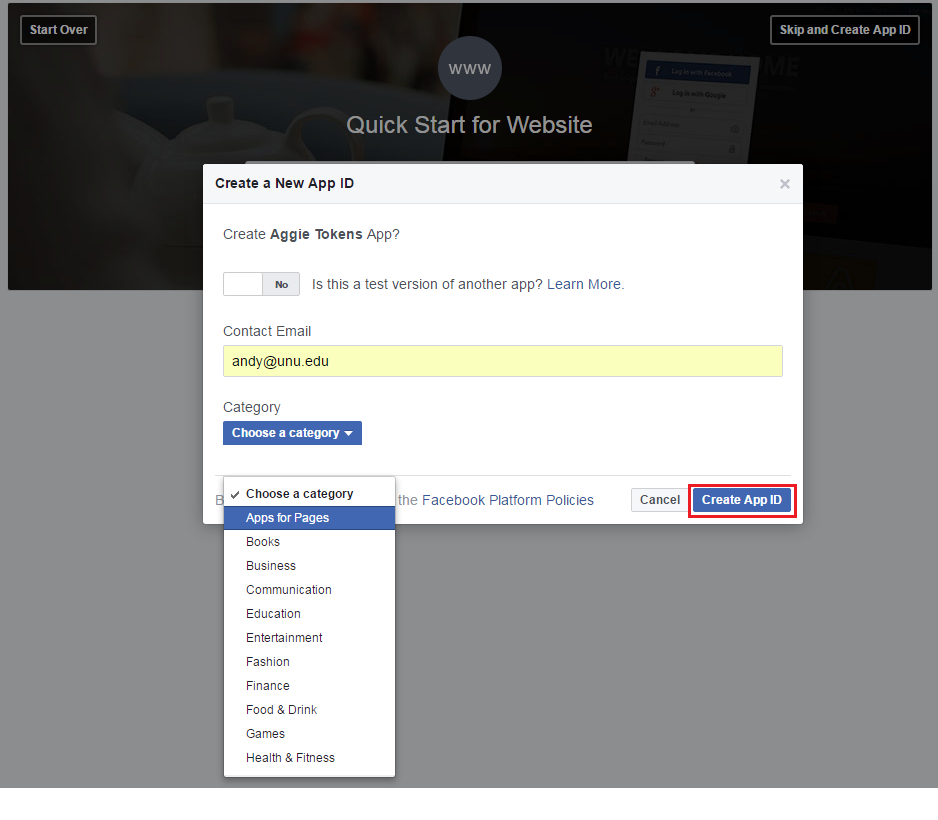
 Facebook Apps
Type in your email address and choose the app category, eg. Apps for Pages and click on Create App ID.
 Facebook Apps
Select the pictures that apply and click Submit.
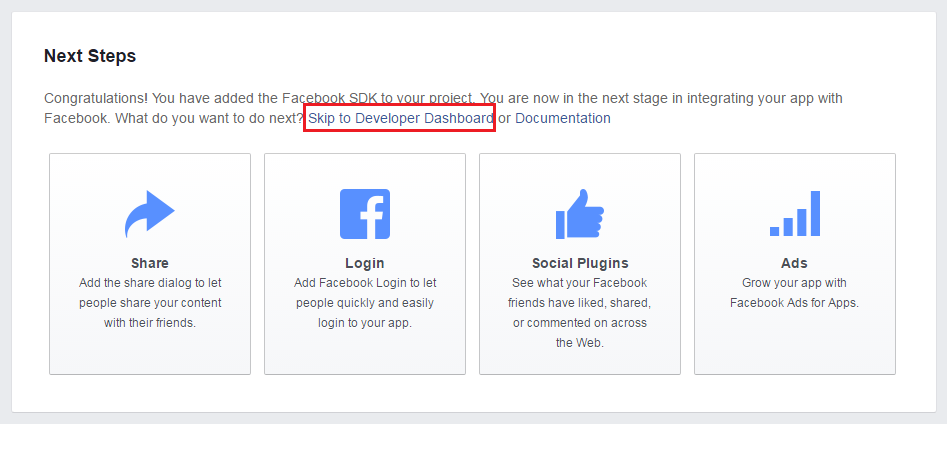
Enter a site URL and click on next.
Click Skip to Developer Dashboard to retrieve your App ID and App Secret.
 Facebook Apps
Click on the Show button and enter your password to show your App Secret.
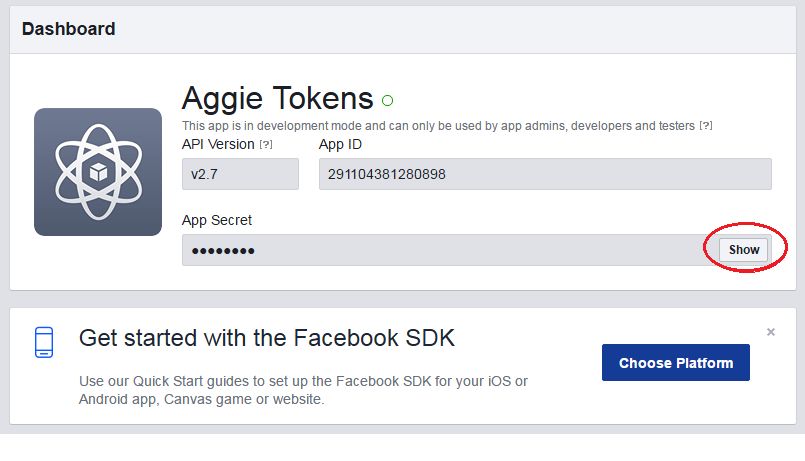 Facebook App
Now with your Facebook App ID and App Secret, copy https://graph.facebook.com/oauth/access_token?client_secret=xxx&client_id=xxx&grant_type=client_credentials into your web browser, replacing the (xxx) in secret = xxx and id=xxx with your App Secret and App ID respectively.
Hit the return key to show your access token.
With this access token,fellow the instructions from Adding Media Feeds to Aggie section and edit the Facebook settings on Aggie.
WhatsApp messages
The WhatsApp feature is documented in a conference paper. As WhatsApp does not currently offer an API, a Firefox extension in Linux is used to redirect notifications from web.whatsapp.com to Aggie server. Thus, you need a Linux computer accessing WhatsApp through Firefox for this to work. Follow these steps to have it working.
Install Firefox in Linux using your distribution preferred method.
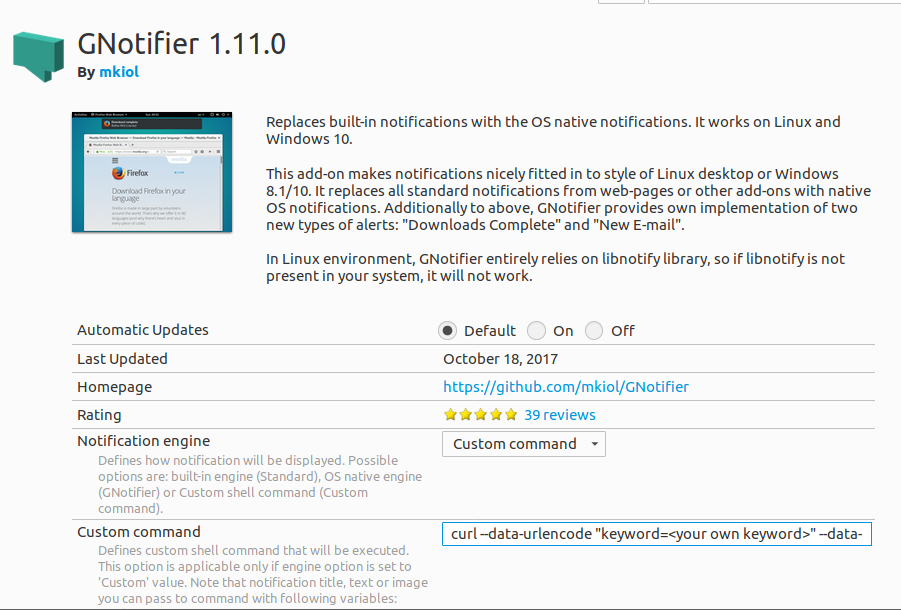
Install GNotifier add-on in Firefox.
Configure the add-on about:addons:
- Set Notification Engine to Custom command
- Set the custom command to
curl --data-urlencode "keyword=<your own keyword>" --data-urlencode "from=%title" --data-urlencode "text=%text" http://<IP address|domain name>:2222/whatsapp- We suggest setting your
keywordto a unique string of text with out spaces or symbols, e.g., the phone number of the WhatsApp account used for Aggie. This keyword must be the same one as the one specified in the Aggie application, when creating the WhatsApp Aggie source. - Replace
IP address|domainwith the address or domain where Aggie is installed (e.g.,localhostfor testing).
- We suggest setting your
 GNotifier Add-on for Firefox
Visit web.whatsapp.com, follow instructions, and enable browser notifications
Notifications will not be sent to Aggie when browser focus is on the WhatsApp tab, so move away from that tab if not replying to anyone.
Google Places API
Aggie uses Google Places API to add location to the incidents, letting users to search for incidents by location. It also powers the maps generated by Aggie. Google accounts with a credit card get a higher free quota of API calls than those accounts without credit card.
- Get your key for Google Places API from your Google account and copy it here. Remember to limit the domain to where Aggie is hosted (e.g., aggie.africanelections.org) when creating you new key.
ELMO Tokens
- Log into your ELMO instance with an account having coordinator or higher privileges on the mission you want to track.
- In your ELMO instance, mark one or more forms as public (via the Edit Form page). Note the Form ID in the URL bar (e.g. if URL ends in /m/mymission/forms/123, the ID is 123).
- Visit your profile page (click the icon bearing your username in the top-right corner) and copy your API key (click ‘Regenerate’ if necessary).
- From Aggie, click Settings -> Settings and edit the ELMO settings. Remember to toggle the switch on, once you have saved the settings
Email Settings
This must be set up to allow newly created users to receive emails from Aggie with their login credentials. Three transport options have been implemented using nodemailer.js:
- SMTP, which requires having access to a working SMTP server.
- Amazon Simple Email Service (SES).
- Sendgrid, an online mail service accessible through a simple API.
In this example we are going to set up the email with Sendgrid’s service.
Click the Settings tab and select the Settings option in the dropdown list.
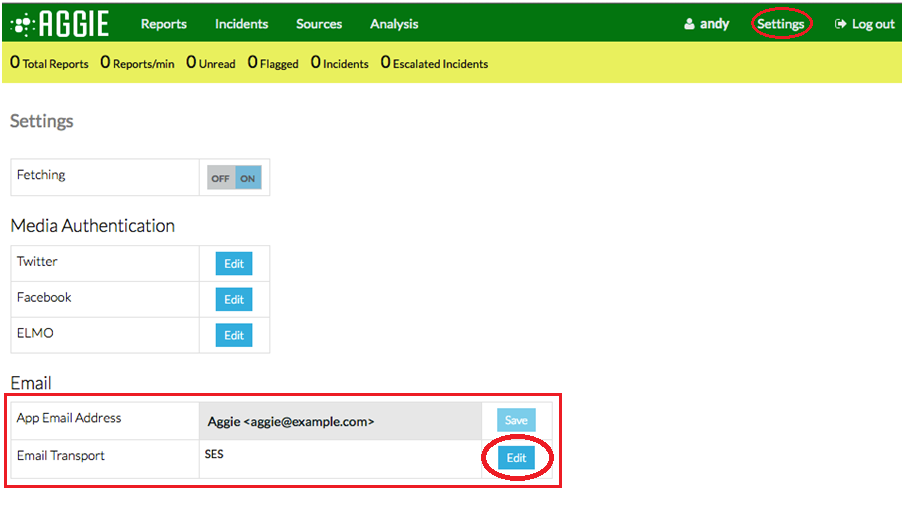 Email
EmailClick Edit on the Email transport row of the email section (the last Edit).
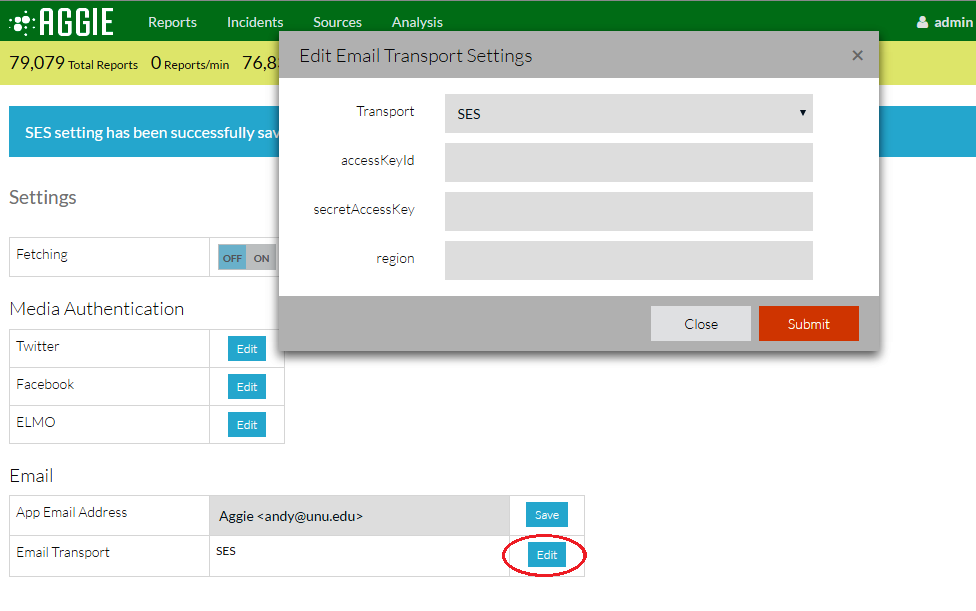 Sendgrid
Choose the Transport method as SendGrid.
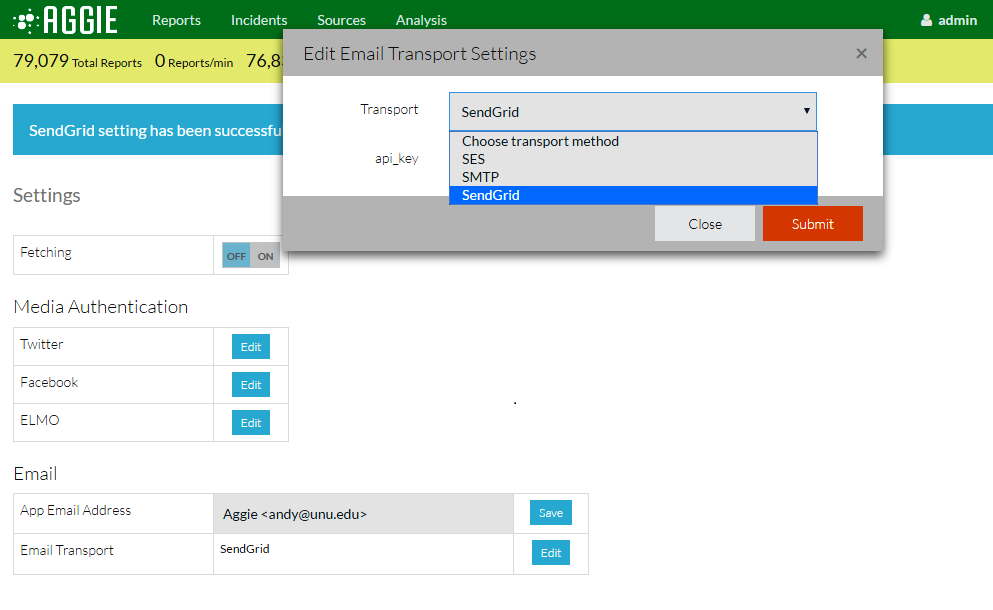 Sendgrid
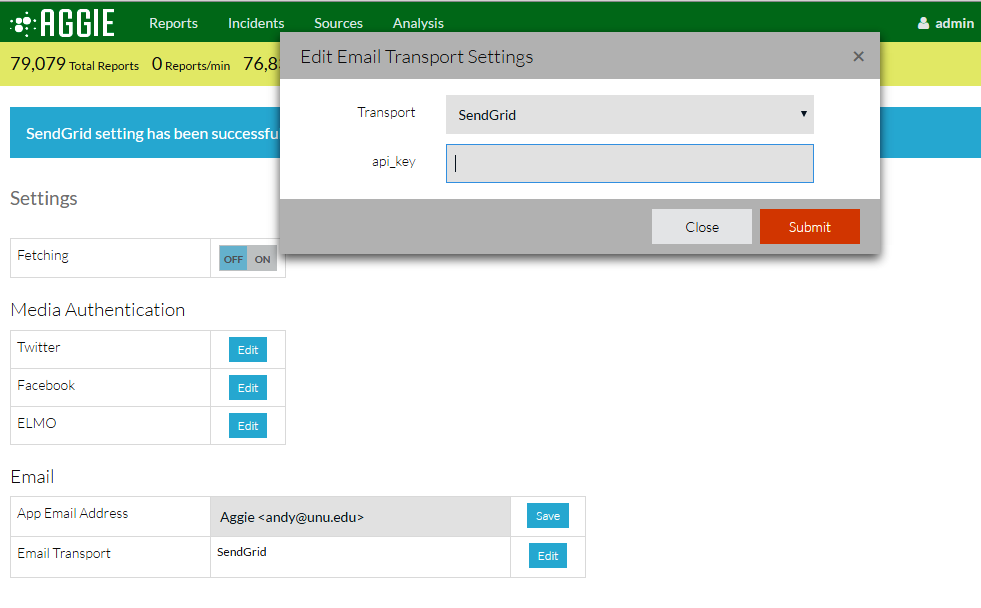
Aggie then requests an API key for use with SendGrid as in the screenshot below.
 Sendgrid
Generating SendGrid API Key
Visit SentGrid’s Page and set up an account. Sendgrid will take one or two days to verify your account before activating it.
From your account click the Settings Menu and select API keys
Click the blue Create API Key on the top right.
 Sendgrid
Select General API key.
 Sendgrid
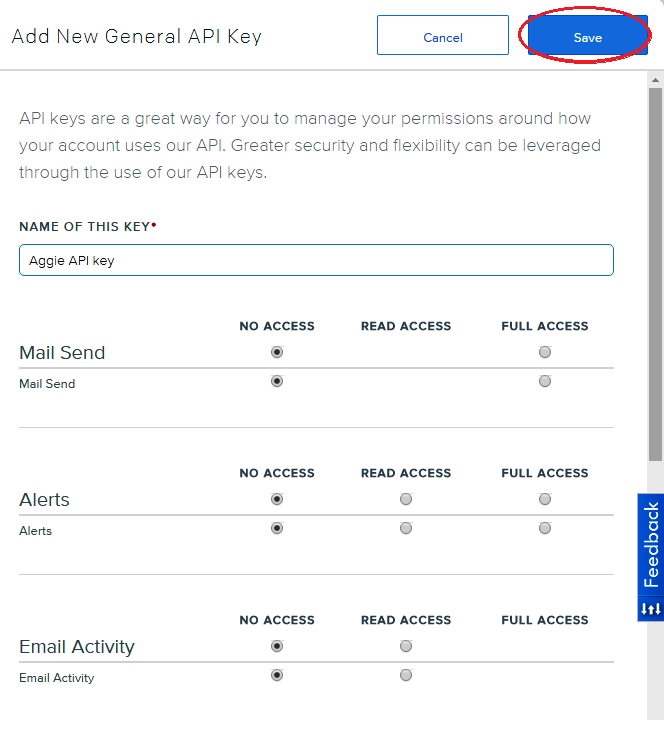
Type a name for the API e.g. Aggie API key and set the appropriate permissions. The only permission needed for this key is the ‘Mail Send ’ one.
 Sendgrid
Click Save to generate an API key for use with Aggie.
Copy the API key and paste it into the api_key field referred to in Transport Email section and click on Submit.
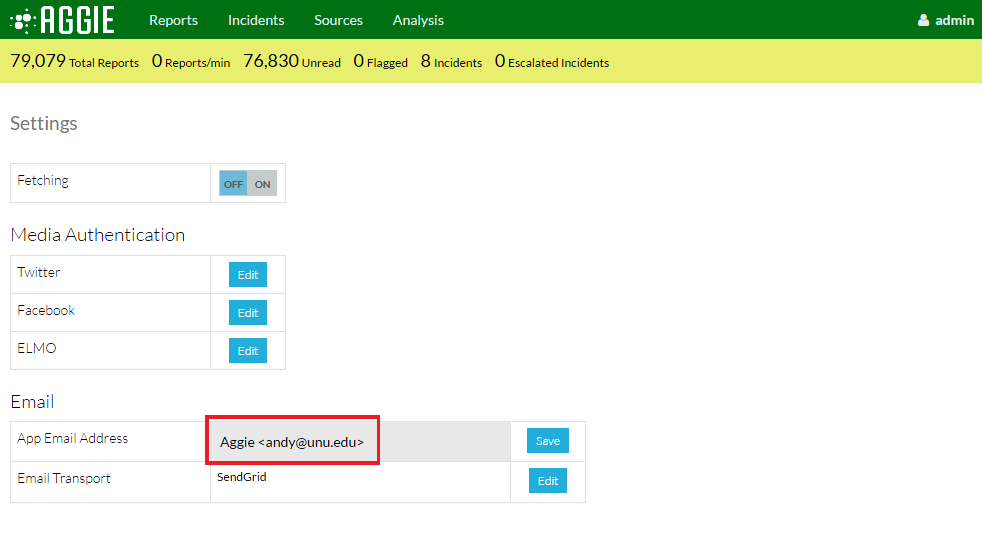
SendgridSet the App Email Address as the email address you used for your SendGrid application.
 Sendgrid
Widgets
Widgets are web components that can be added to webpages. In Aggie, widgets are used to display information for public consumption outside of the SMTC. As usual, there is need to be careful with what information is made public, so use widgets with care so not to link individuals with information that may compromise them. At the moment there is only one widget available, the Public Incident Map.
Public Incident Map
The Public Incident Map displays those incidents that have been marked public by the escalation team. It uses the Google Places API, and thus, should be set before using the map.
- Center and zoom define the main variables for the map. It will be centered in the country, city or other location you choose. The zoom variable specifies how large area will be displayed in the map.
- You can see the result at https://
/widget/public_incident_map.html - You can add the map to any webpage with the following code:
<iframe src="https://<your-domain>/widget/public_incident_map.html" width="xxx" height="yyy"></iframe>
- Markers in the map have different meanings according to the their color, as shown in the table below. You can copy this table for your site if needed.
| Map Key | |
|---|---|
 |
confirmed true incident |
 |
confirmed false incident |
 |
unconfirmed incident |
 |
click to expand incidents |
Social Media Feed Authentication
Adding Media Feeds to Aggie
From the header menu, click on Settings.
From the dropdown list, click on Settings.
Click on Edit to authenticate the Twitter, Facebook or Elmo feed settings.
Note: Now we need to generate the access tokens for all social media sources. After that, we would copy and paste respective authentication tokens generated for each of the social media feeds, save the settings and toggle the Fetching switch ON.